Monday, March 27, 2023

Italian Sodas... Wedding Style.

Our love of Italian Sodas is still going strong.

I can't believe it's been almost 9 years since this post.

I recently helped my dear friend Rebecca with an Italian Soda bar at her daughter's wedding reception, and thought I would share our fun drink combinations. I can't take the credit - my darling daughters helped me narrow down the drink menu and create fun names for each combination. They were ALL delicious (don't ask me how I know), and the Soda Bar was a hit at the reception.


We went with pumps on the syrup bottles because we knew we could potentially have a lot of people wanting drinks all at once. We also decided it would mitigate the mess a little (vs. pourers). We used a total of 4 pumps of syrup per 16oz cup. If there were three flavors in the drink combination, we would do 2 pumps of the first flavor listed, and one pump of each of the other flavors. I decided to put the cream into bottles with pourers, and we determined that a count to five while dispensing the cream into the cups produced the yummiest result.

Here's a close-up of the menu:


These beautiful ladies (plus a few others... and Billy-my-hero, not pictured) helped me pull it all off.


I couldn't have done it without them (and Lex, Bill, Jonah, and my friend Jeanne). I didn't get pics of any of us in action, but the evening went smoothly, and it was fun to bartend and chat with the happy wedding guests.

If I was a younger woman with energy and ambition, I might pursue marketing my services. 

But I'm not haha. I'm a momma, a Gigi, and a friend just trying to help out.

These drink combinations are so yummy - give them a try ♥

Thursday, January 17, 2019

Pressure Cooker Lemon Artichoke Chicken

I do not have an Instant Pot.

Instead I have an electric Cuisinart pressure cooker, which I've had since BEFORE the Instant Pot became the rage. It's similar... it just doesn't have settings like "poultry" or "slow cooker." It sautes, warms, and can cook with high or low pressure. I love it. Probably just as much as you love your Instant Pot.

This was originally an Instant Pot recipe found on the world wide web. (link here)

I had to make a few modifications, since I didn't have the EXACT ingredients, which changed the recipe enough for me to call it mine {wink}. We LOVED it, that is why I'm quickly capturing my recipe... before I forget what I did haha.

Sorry to disappoint, but I will be sharing only my quickly snapped phone pics. I'm sure they are not the most impressive, but I'm not making money at this, so I figure you'll just have to trust me that, despite my lack of presentation, this is YUMMY!


So So Good Pressure Cooker Lemon Artichoke Chicken

3 lbs. chicken breast (I had two large Costco fresh chicken breasts, but you could easily use 3)
1 cup chicken broth (I used 1 Tbs. of Better-than-Bouillon Roasted Chicken paste + 1 cup water)
1 (33.5 oz) jar whole artichoke hearts in water (not marinated - I get mine at Sam's Club)
1 lemon, sliced

Antipasto marinade:
1/4 cup olive oil
1/4 cup red wine vinegar
1 Tbs. Dijon mustard
1 tsp. honey
1/2 tsp. dried basil
1/4 tsp. dried oregano
1 large clove fresh garlic, minced (or pressed)
Salt and pepper

1 lb. angel hair pasta (cooked according to package directions)

Put the trivet in the bottom of your pressure cooker, then add the chicken broth (or bouillon and water). Place chicken breasts on top of the trivet.

Drain the artichokes and cut into halves or quarters, then place on top of the chicken.


Add lemon slices. In a small bowl, whisk the antipasto marinade ingredients together, then pour over the top of the chicken, artichokes, and lemon. Put the lid on, set timer for high pressure for 15 minutes, then allow a natural release for 5 minutes before releasing the pressure. Once the pressure is released, remove the chicken from the pot and shred. You can also remove the lemon slices if you'd like :-)


Cook your pasta while you are waiting for the natural release - angel hair only takes 4 to 5 minutes.

Drain the pasta and place in a bowl. Toss with some of the juices from the pressure cooker. To plate, top pasta with shredded chicken, then spoon artichokes and a little juice/sauce over the top.

My two large chicken breasts easily made 4 servings, so 3 breasts would serve 6. I had left over angel hair pasta, so I think it's safe to say 1 lb. would serve 6 nicely.

This. Is. Delicious.

Trust me.


Friday, December 21, 2018

Better-than-BYU Mint Brownies

My married daughters keep asking me to post recipes, but I'm hesitant because I don't have pictures of any of them. I'm like any other non-professional blogger/baker/chef, which means when I cook, I am usually cooking with a specific purpose OTHER than sharing on the web. These brownies, however, have been my MOST REQUESTED recipe of those who I've made them for, so I'm posting to have an easy place to send recipe-seekers to.

The past two years my youngest daughter has participated in her high school musical. When it's tech week (the week prior to the show), the kids start running the show immediately after school until 9 or 10 at night. During this week the parents of the participants bring in dinner for the cast and crew. Last year I signed up for "2 dozen hand-held treats" on 3 or 4 evenings, and I made a double batch of these brownies the first night. My daughter came home that night and said that the kids loved the brownies and hoped I would bring them again, which I did. They were a hit (no pun intended haha), so I also signed up to make them for the cast party. This year they were requested before tech week even began. It's safe to say I've made a double batch recipe at least a dozen times in the past year... and I've never taken a good picture of the finished brownies. I snapped these pictures of some that were left over from a neighborhood party my husband and I hosted last week -- these are actually half of a brownie, but I'll explain about brownie sizes after the recipe.


Better-than-BYU Mint Brownies

Brownie:
1 cup butter, melted (2 sticks)
2/3 cup cocoa powder
2 cups sugar
4 eggs
1-1/2 cup flour

Mix butter, cocoa, and sugar; add eggs, one at a time, beating well after each one. Stir in flour. Spread into a greased 9x13" pan. Bake at 350 degrees for 25 minutes. Let cool completely.

Mint Frosting:
1/2 cup butter, softened (1 stick)
1 lb. powdered sugar
1 to 3 Tbs. milk
2 tsp. mint extract
Green food coloring

Mix butter and powdered sugar. Add only enough milk to make a smooth consistency. Add mint extract and enough food coloring for a light green color. Frosting will be fairly thick. Spread over brownie layer and refrigerate until firm.

Chocolate topping:
1-1/2 cup semi-sweet chocolate chips
1/2 cup butter (1 stick)

Melt chocolate chips and butter in microwave for 2 minutes on 80% power, stir to combine. If more time is needed, microwave in 20 second increments, then stir, until smooth. Pour over frosted brownies, covering mint frosting completely (an off-set spatula is your best friend). Refrigerate until topping is set and hardened. Let brownies sit at room temp for 10 to 15 minutes before cutting. Cut into 24 squares (I use a paper towel to wipe my knife with each cut for clean edges).

**Notes: I have primarily made these by doubling the brownie recipe and using a half-sheet pan. I generally only 1-and-a-half times the mint frosting and chocolate topping when doubling the recipe. In the pictures included with this post I fully doubled the mint frosting and chocolate topping, and they were REALLY rich. I think I like them better with the 1-1/2 recipe. If you love those thick layers, then by all means, fully double all recipes. IF you are only making a single recipe, you will have thicker layers unless you do the math to decrease the recipe size of toppings. That makes sense, right?

The half-pan doubled recipe can be cut into 48 servings... or 96 if you cut them in half again, which is perfect when there are other selections of treats. Those half servings also fit nicely into cupcake papers, as you can see from the second picture.

For full disclosure, here, I've never had a BYU mint brownie... I have heard about them. I have, however, had people who HAVE had them tell me these are better. I made them for my daughter Shilo's high school graduation party, and since she would be attending BYU that fall, just for fun I called them "Better-than-BYU Mint Brownies."

Mom-made is always better, right?

Creamy Peppermint Patties

I've had a few failures this year as I have made Christmas candy.
Some because I tried a new recipe (from an author who swore it was the easiest recipe for toffee), which resulted in a pound or two of butter + sugar + chocolate thrown away in the trash can.
I'm pretty sure I've dumped at least 4 pounds of butter this year.
AAAUUUUGGGHHH!

Other failures most likely came from my rush to git 'er done, or my never-ending attempts to multi-task, neither of which have done me any good.

But you're here to see a success story, so here it is.

My daughter, Lex, and her baby are staying with me for a few months while she patiently waits for her new home in Alabama to be built. Her husband is already working there, but she said she'd rather wait the majority of the 6-month process at my house than spending it (and a lot o' money) in a little apartment in a town where she hardly knows anyone. I'm thrilled to have her and my cute grandson here with us, so I think it's a win-win. 

Lex is the one who suggested we make the peppermint patties, since they were her favorite homemade Christmas treat when she was in high school. I haven't made them for a few years, but I'm almost ready to make them exclusively from here on out because they are easy and nearly no-fail (unless you accidentally leave them. after you have carefully packaged them in cute cellophane bags tied with twine, on the table where the winter sunshine pours in each morning-to-midday...then they melt and get stuck together. Don't ask me, in this year of many failures, how I know that haha).


Lexee's Favorite Peppermint Patties

1 (8oz) pkg cream cheese, softened
2 tsp. peppermint extract
9 cups powdered sugar
1 cup milk chocolate chips
1 cup semi-sweet chocolate chips
3 Tbs. shortening

In large bowl (I use my 6 qt KitchenAid bowl) beat cream cheese and peppermint extract until smooth. (I use my cookie dough attachment.) Gradually add in powdered sugar, beating well. 

**Note: sometimes I only use 8 cups of powdered sugar, depending on how stiff the mixture feels. You want it to hold together well, so if it gets too dry it doesn't do that. 

Shape into 1" balls (I use a little cookie scoop, then roll in my hands), and place on waxed paper-line baking sheets (I use a silpat liner). Flatten into patties (I use the bottom of a glass, which I occasionally dip in flour to prevent the patties from sticking to the bottom of). 

**Note: I usually make 6 to eight balls at a time, then flatten - if you go too long before flattening the balls, they tend to dry out a bit and the edges crack. 

Cover and refrigerate for 1 hour or until chilled.


In microwave, melt chips and shortening (I usually put them in for 1.5 minutes on cook power 7); stir until smooth and all lumps are gone. Dip patties in melted chocolate. I have done this using a fork, tapping it on the edge of the bowl to let excess chocolate drip off, but I now have a candy-dipping tool that is a little easier to use. Place patties on waxed paper (or silpat liner) and refrigerate until the chocolate is firm. 

Once the patties are firm, you can trim any unruly chocolate edges with {clean}scissors. Store in the refrigerator. Makes about 4 dozen.


No, I am NOT a stylist or a photographer, but hopefully you can get the gist. Yes, I am a bit sloppy and ALWAYS in a hurry haha.

I have received a ton of compliments on these this year, and since no candy thermometer is involved, they are easy and pretty much no-fail (let's just say I've NEVER had to throw away a batch).

Way better than York, just sayin'.

Friday, August 11, 2017

Britt's {back-of-the-box} Graham Cracker Chocolate Chip Cookies


When I was in Utah last week, my daughter Britt made these little yummies. She had found the recipe on the back of a Kroger graham cracker box, and said they were super good... and they were. Maybe even some of my favorite cookies of all time.

Therefore, even though I don't have a picture {yet}, I am posting the recipe.

Actually, I do have a picture haha:

If you don't want to have to squint to read the recipe, I'll type it out here, too!


BRITT'S {BACK-OF-THE-BOX} 
GRAHAM CRACKER CHOCOLATE CHIP COOKIES

1-and-1/2 cups graham crackers, finely crushed (about 1 sleeve + 2 full crackers)
1/2 cup flour
2 tsp. baking powder
1 (14oz) can sweetened condensed milk
1/2 cup butter, softened
2 cups chocolate chips
1 cup walnuts (optional... she didn't add them to the batch she made when I was there)
1 cup flaked coconut (optional... she DID add this. So so yummy if you are a coconut lover)
1 tsp. vanilla extract

Preheat oven to 350 degrees.

In a medium bowl, mix together graham cracker crumbs, flour, and baking powder.

In another bowl, beat sweetened condensed milk and softened butter until smooth. Add vanilla extract. Add crumb mixture and stir until smooth. Add chocolate chips, coconut, and I would assume the walnuts (if using -- funny thing the recipe doesn't mention them in the directions).

Drop by teaspoonfuls onto a lightly greased cookie sheet.

Bake 12 to 14 minutes or until lightly browned.

Let cool 5 minutes, then remove to a wire rack to cool completely.


If I had graham crackers at this moment, I'd be making these RIGHT NOW. But I don't.
Soon... very soon.

Wednesday, March 15, 2017

Browned Butter Rice Krispies Treats

I have sadly neglected my recipe blog. I will try to improve, once things have settled down (I'm in the process of listing my home for sale and moving PLUS I've had a daughter return from a mission for our church, a granddaughter born and in the NICU for 3 weeks, and a whole lot o' life going on ALL. THE. TIME.)

I have needed to post this recipe since my sister and I created it (it's modified from this recipe)... which I think was about a year ago when I was visiting her in CA. Since then I have made too many batches to count (9 batches for my nephew's wedding back in June, 9 batches for concessions at my daughter's school musical... plus all those single batches made to share... or to consume).

Finally, I'll post it, so I won't have to keep looking up the recipe and explaining my modifications to those who request it.

I know I call everything "the best," but these truly are. I'm serious.


BEST EVER BROWNED BUTTER RICE KRISPIES TREATS

10 cups crispy rice cereal
1 cup (2 cubes/sticks) real butter
2 (10oz) bags mini marshmallows + extra*** (optional, but yummy)
1 Tbs. vanilla
1/4 tsp. sea salt (other salt is fine, too, I just think sea salt has a bit stronger flavor)

Measure 10 cups of rice cereal and place in large bowl. (NOTE: I discovered that 1 cup of cereal = 1 oz., so that makes determining how much cereal you need easier, especially if you are making large quantities.)

***IF YOU ARE USING EXTRA MARSHMALLOWS IN YOUR RECIPE... put 3 cups of cereal in the bowl, then add 1/3 to 1/2 of your EXTRA (10oz) bag of marshmallows to the bowl, then add the remaining 6 cups of cereal on top. (The reason to put the marshmallows in the center of the rice cereal is so that they don't melt completely while you are mixing in the hot marshmallow mix... you want to see pieces of marshmallow in the finished rice krispies treat.)

Line a 9x13 baking pan with aluminum foil and spray with non-stick cooking spray.

Melt butter over medium heat in a large pot. Once the butter is melted, continue cooking it until it starts to foam and turn brown. Watch carefully, stirring occasionally, for this process to happen as you don't want to BURN the butter. Once the butter has turned brown, remove from heat and pour in 2 bags of marshmallows, stirring to coat with butter. Add vanilla and salt, then return to heat and stir constantly until marshmallows are melted. Don't keep this mixture over the heat any longer than needed, as the longer it "cooks," the less chewy and soft your finished treat will be.

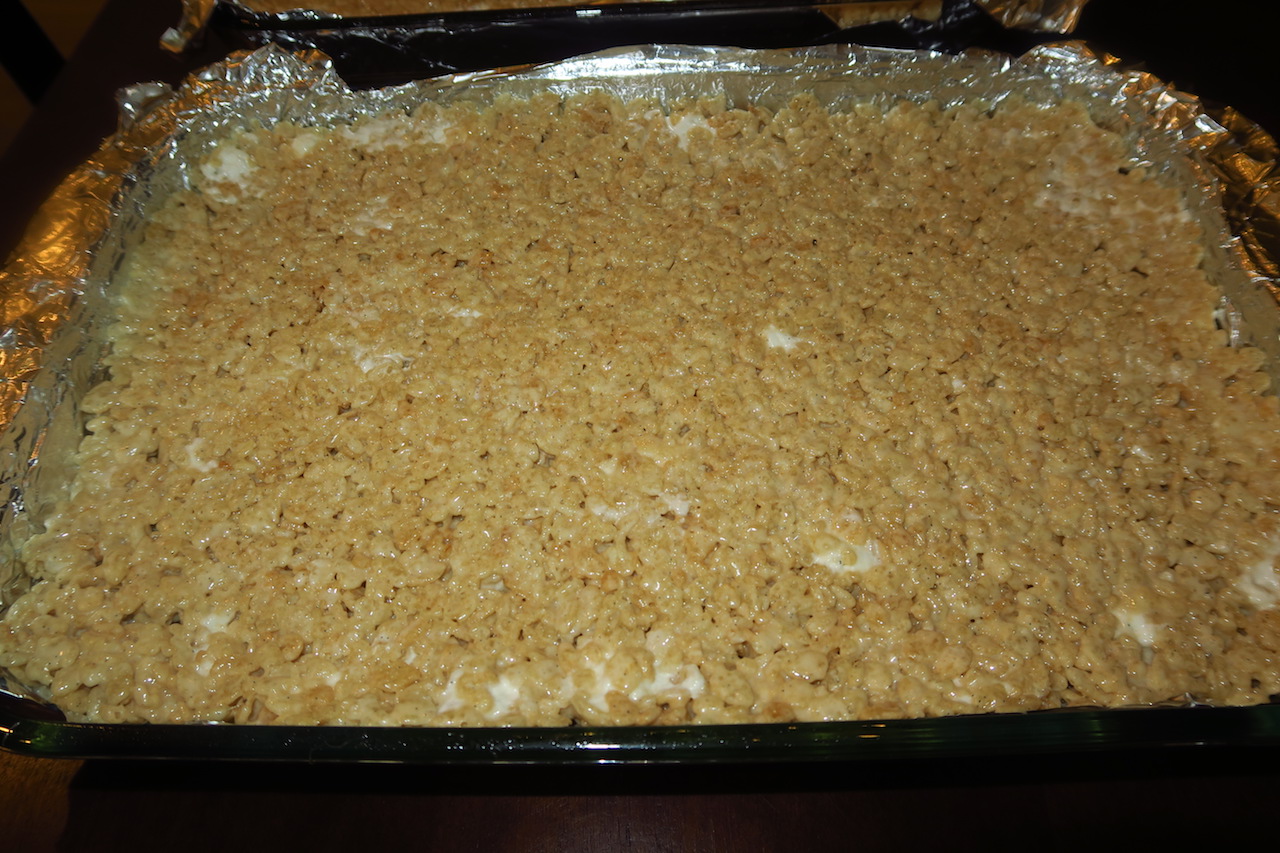
Immediately pour mixture over the cereal (+ extra marshmallows, if adding) and stir thoroughly to combine. Dump mixture into prepared foil-lined baking dish and press/smooth into place (I use a large metal spoon coated with butter to make this process easy). Let treats cool to room temp uncovered. Once cool, remove from pan by lifting up on the edges of the foil, then cut into 12 squares (if you desire perfection - which I try occasionally - you can trim the curved edges off before cutting, then use a ruler to make your squares a consistent size). Wrap in saran or waxed paper.

Note: if you are not cutting them for a while, cover with saran once they are cooled.


Here's a few pics of the process:

Butter starting to foam...

...then starting to brown...

...and removed from the heat.

Marshmallows, vanilla, and salt added to the butter in the pan.

When I want to make them extra special I use this vanilla... other vanilla works great, too, though.

Back on the heat to melt (the little black specks in this mixture are from the vanilla bean paste... if you're using regular vanilla it won't have those).


See the bits of marshmallow? Slightly melted, but still intact ;-)

This is my favorite spoon to use when pressing the mixture into the pan and smoothing the top...

Coated with butter, of course.


This was the 9 batch day in preparation for my nephew's wedding luncheon. I didn't have (9) 9x13 pans, so after a batch had cooled a bit, I was able to remove it carefully from the pan to finish cooling and setting up.


Seriously, these are the best.

Sunday, September 4, 2016

Judy's {Flourless} Monster Cookies

I have made several attempts at monster cookies in the past. My daughter had a friend in high school whose mom always made them, and she LOVED them. I kept telling her I needed the recipe, because anytime I would attempt a recipe found elsewhere, they just weren't as good. I never, however, actually got her friend's mom's recipe, so I pretty much gave up on monster cookies in general.

I was visiting that same daughter not too long ago, and she had some monster cookies sitting on her kitchen counter. Yum. They were soooooo good. She told me it was her mother-in-law's recipe, included in a book of recipes she gave Britt for her wedding. I asked to look at it, and started snapping phone pics of some of the recipes. The thing I noticed about this particular monster cookie recipe in comparison to the earlier recipes I had tried: no flour. I seriously questioned if they would actually turn out.

Yep, they did. This recipe is definitely worth keeping... and sharing!


JUDY'S {FLOURLESS} MONSTER COOKIES

3 eggs
1 cup sugar
1 + 1/4 cup brown sugar
1/2 cup softened butter
1 tsp. maple syrup
1 + 1/4 cup peanut butter
1 tsp. vanilla
1 tsp. salt
2 tsp. baking soda
4 + 1/2 cups oatmeal (regular old fashioned)
1 pkg. chocolate chips
1 bag M&M's

Cream together sugars and butter, then mix in eggs and maple syrup. Add peanut butter, then mix in baking soda and oatmeal. Add chocolate chips and M&M's.

Bake at 350 degrees for 10 minutes.


Notes: Britt's tip ~ use peanut butter M&M's. I also like to add in various types of chips (peanut butter, white, etc), so I typically will add half a bag of 4 different types of chips and M&M's. I also just mix everything in my KitchenAid stand mixer with the cookie dough attachment... easy peasy.